
Pearl V. Ryder
In the previous blog post in this series, I demonstrated how I masked out debris that was brighter than the fibers of interest. In this post, I’ll walk through how I enhanced the fibers in order to increase their brightness and decreased the background intensity of the images. If you’d like to follow along in CellProfiler, the pipeline and images for this project are available here.
As I was inspecting the images, I noted that many of the fibers had quite a low intensity relative to the intensity of the background. I therefore wanted to increase the intensity of the fibers using the EnhanceOrSuppressFeatures module. I tested two methods for enhancing Neurite-like structures: the Tubesness method and the Line features method. I found that the Tubeness method increased the fiber intensity relative to the background, while the Line structures method resulted in a lot of very bright noise in the background. For that reason, I decided to stick with the Tubeness method. As you can see, a lot of image analysis work is empirical!
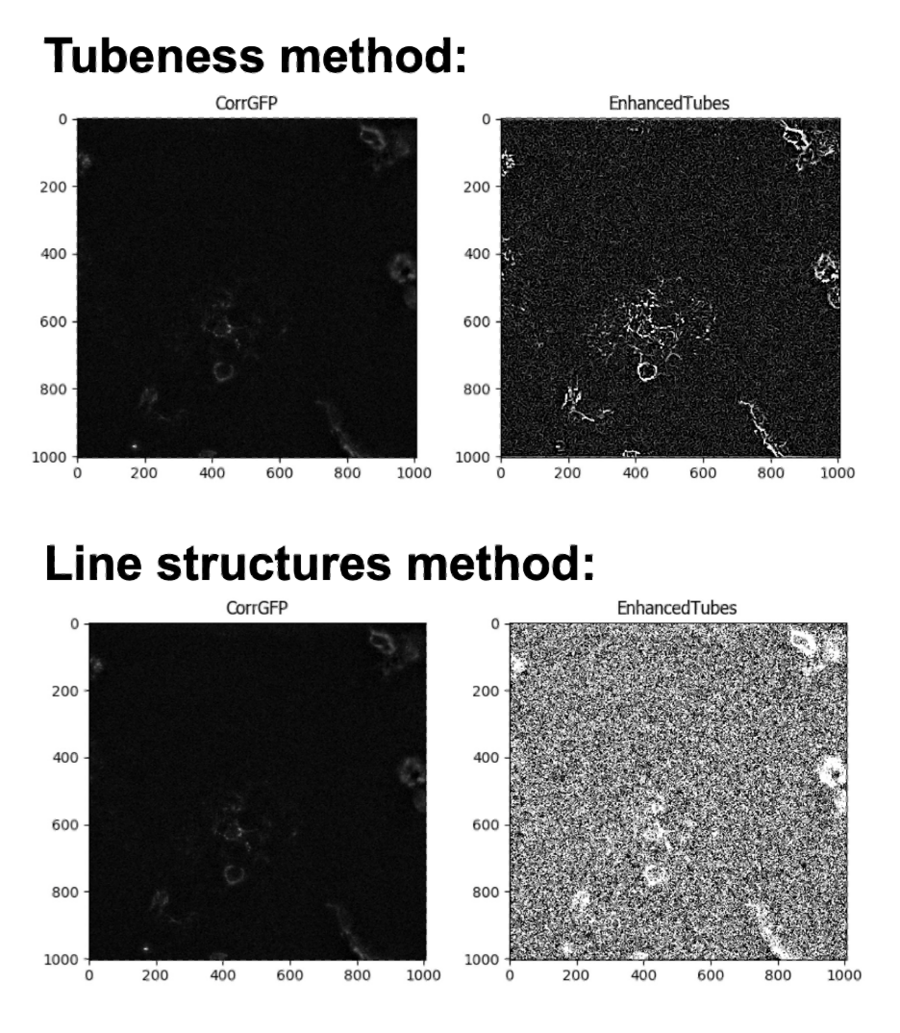
Comparing the results of fiber enhancement using the Tubeness and the Line structures methods. Note how the tubeness method increases the brightness of the fibers relative to the background, while the line structures method increases the brightness of the background.
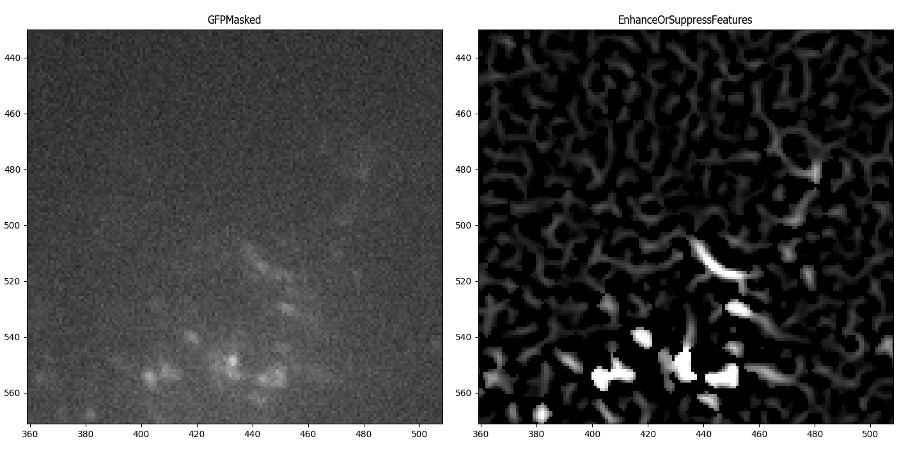
I did note that EnhanceOrSuppressFeatures picked up some background signal and create meaningless looking fibers – the intensity of those maxes out at ~0.0175 vs ~.09 for the “real” fibrils:
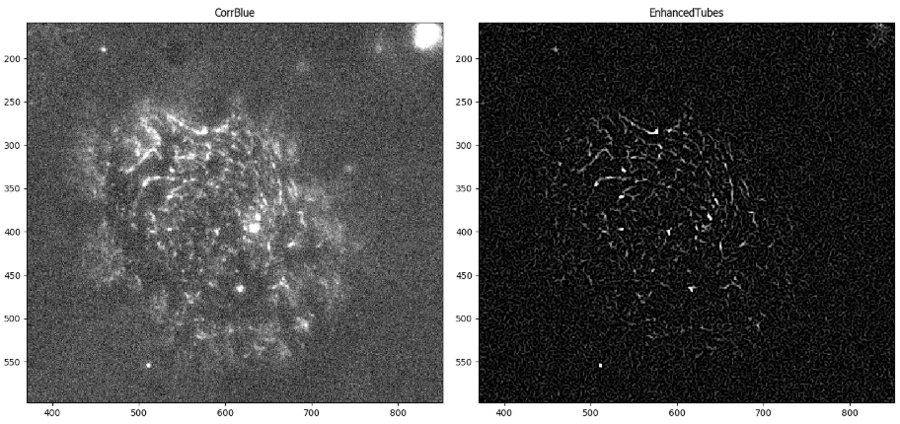
I decided to add a background subtraction step (using CorrectIlluminationCalculate in “Background” mode and CorrectIlluminationApply in “Subtract” mode) to help reduce the intensity of those fibers created in the background. I was pleased to find that the small lines were still there, but there was greater contrast between them and the fibril signal. Ultimately, this image will be easier to segment, since the background is darker:
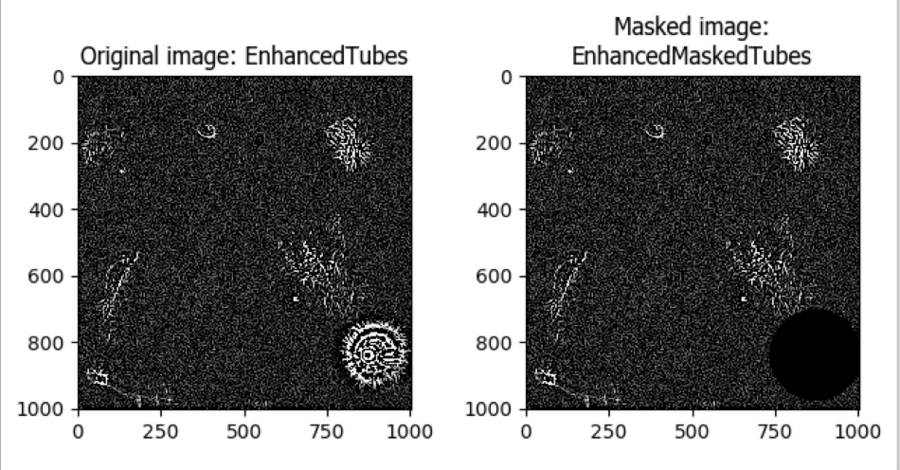
I applied the bright debris objects created in Part II as a mask to this enhanced image. The resulting image is ready for fibril object detection using IdentifyPrimaryObjects.
In the next post in this series, I’ll share the details of how I configured the IdentifyPrimaryObjects module to segment fibers within these images.